 Veronica K. B. Olsen
228 lines
12 KiB
Markdown
228 lines
12 KiB
Markdown
# novelWriter
|
|
|
|
[](https://github.com/vkbo/novelWriter/actions/workflows/test_linux.yml)
|
|
[](https://github.com/vkbo/novelWriter/actions/workflows/test_win.yml)
|
|
[](https://github.com/vkbo/novelWriter/actions/workflows/test_mac.yml)
|
|
[](https://github.com/vkbo/novelWriter/actions)
|
|
[](https://codecov.io/gh/vkbo/novelWriter)
|
|
[](https://novelwriter.readthedocs.io/en/latest/?badge=latest)
|
|
[](https://github.com/vkbo/novelWriter/releases)
|
|
[](https://pypi.org/project/novelWriter)
|
|
[](https://pypi.org/project/novelWriter)
|
|
|
|
<img align="left" style="margin: 0 16px 4px 0;" src="https://raw.githubusercontent.com/vkbo/novelWriter/main/setup/icons/scaled/icon-novelwriter-96.png">
|
|
|
|
novelWriter is a plain text editor designed for writing novels assembled from many smaller text
|
|
documents. It uses a minimal formatting syntax inspired by Markdown, and adds a meta data syntax
|
|
for comments, synopsis, and cross-referencing. It's designed to be a simple text editor that allows
|
|
for easy organisation of text and notes, using human readable text files as storage for robustness.
|
|
|
|
The project storage is suitable for version control software, and also well suited for file
|
|
synchronisation tools. All text is saved as plain text files with a meta data header, the core
|
|
project structure is stored in a single project XML file, and other meta data is primarily saved as
|
|
JSON files.
|
|
|
|
The full documentation is available on [readthedocs.io](https://novelwriter.readthedocs.io).
|
|
|
|
## Implementation
|
|
|
|
The application is written in Python 3 (3.6+) using Qt5 and PyQt5 (5.3+). It is developed on Linux,
|
|
but should in principle work fine on other operating systems as well as long as dependencies are
|
|
met. It is regularly tested on Debian and Ubuntu Linux, Windows, and macOS.
|
|
|
|
## Project Contributions
|
|
|
|
Contributions to this project are welcome. However, please read the
|
|
[Contributing Guide](https://github.com/vkbo/novelWriter/blob/main/CONTRIBUTING.md) before
|
|
submitting larger additions or changes.
|
|
|
|
If you want to help translating novelWriter into another language, please see the
|
|
[README](https://github.com/vkbo/novelWriter/blob/main/i18n/README.md) in the `nw/assets/i18n`
|
|
folder.
|
|
|
|
## Key Features
|
|
|
|
Some key features of novelWriter are listed below. Consult the
|
|
[documentation](https://novelwriter.readthedocs.io) for more information.
|
|
|
|
### Markdown Flavour
|
|
|
|
Note that novelWriter is _not_ a proper Markdown editor. It is a plain text editor that uses
|
|
Markdown-like syntax to allow for a minimal set of formatting that is useful for the specific task
|
|
of writing novels. The formatting is currently limited to:
|
|
|
|
* Headings levels 1 to 4 using the `#` syntax only.
|
|
* Emphasised and strongly emphasised text. These are rendered as italicised and bold text.
|
|
* Strikethrough text.
|
|
* Hard line breaks using two or more spaces at the end of a line.
|
|
|
|
That is it. Features not supported in the editor are also not exported when using the export tool.
|
|
|
|
In addition, novelWriter adds the following syntax used for its additional features:
|
|
|
|
* A line starting with `%` is treated as a comment and not rendered on exports unless requested.
|
|
Comments do not count towards word counts and other statistics.
|
|
* If the first word of the comment is `synopsis:`, the comment is indexed and treated as the
|
|
synopsis for the section of text where it occurs. These synopsis comments can be used to build an
|
|
outline and exported to external documents.
|
|
* A set of meta data keyword/values starting with the character `@`. These are used for tagging
|
|
and inter-linking documents, and can also be included when generating a project outline.
|
|
* A variety of thin and non-breaking spaces are supported. Some of them depend on the system
|
|
running at least Qt 5.9. Earlier versions of Qt will unfortunately strip them out when saving.
|
|
* Tabs can be used in the text, and should be properly aligned in both editor and viewer. This can
|
|
be used to make simple tables and lists. Note that for HTML exports, most browsers will treat a
|
|
tab as a space, so it may not show up like expected. Open Document exports should produce the
|
|
expected result.
|
|
|
|
The core export formats of novelWriter are Open Document and HTML5. Open Document is an open
|
|
standard for office type documents that is supported by most office applications. See
|
|
[Open Document > Application Support](https://en.wikipedia.org/wiki/OpenDocument#Application_support)
|
|
for more details.
|
|
|
|
You can also export the entire project as a single novelWriter-flavour document. These can later be
|
|
imported again into novelWriter. In addition, printing and export to PDF is offered through the Qt
|
|
library, although with limitations to formatting.
|
|
|
|
### Colour Themes
|
|
|
|
The editor has syntax highlighting for the features it supports, and includes a set of different
|
|
syntax highlighting themes. Optional GUI themes are also available, including dark themes.
|
|
|
|
### Easy Organising of Project Files
|
|
|
|
The structure of the project is shown on the left hand side of the main window. Project files are
|
|
organised into root folders, indicating what class of file they are. The most important root folder
|
|
is the `Novel` folder, which contains all of the files that make up the novel itself. Each root
|
|
folder can have subfolders. Subfolders have no impact on the final project structure, they are
|
|
there for you to organise your files in whatever way you want.
|
|
|
|
The editor supports four levels of headings, which determine what level the following text belongs
|
|
to. Headings of level one signify a book or partition title. Headings of level two signify the
|
|
start of a new chapter. Headings of level three signify the start of a new scene. Headings of level
|
|
four can be used internally in each scene to create separate sections.
|
|
|
|
Each novel file can be assigned a layout format, which shows up as a flag next to the item in the
|
|
project tree. These are mostly to help the user track what they contain, but they also have some
|
|
impact on the format of the exported document. See the
|
|
[documentation](https://novelwriter.readthedocs.io) for further details.
|
|
|
|
### Project Notes
|
|
|
|
Supporting notes can be added for the story plot, characters, locations, story timeline, etc. These
|
|
have their separate root folders and are optional to use.
|
|
|
|
### Visualisation of Story Elements
|
|
|
|
The different notes can be assigned tags, which other files can refer back to using `@`-prefixed
|
|
meta keywords. This information can be used to display an outline of the story, showing where each
|
|
scene connects to the plot, and which characters, etc. occur in them. In addition, the tags
|
|
themselves are clickable in the document view pane, and control-clickable in the editor. They make
|
|
it possible to quickly navigate between the documents while writing.
|
|
|
|
## Standard Installation
|
|
|
|
For a regular installation, it is recommended that you download one of the minimal zip files from
|
|
the [Releases](https://github.com/vkbo/novelWriter/releases) page or the
|
|
[novelwriter.io](https://novelwriter.io/) website.
|
|
The [documentation](https://novelwriter.readthedocs.io/) has detailed install instructions for
|
|
[Linux](https://novelwriter.readthedocs.io/en/latest/setup_linux.html),
|
|
[Windows](https://novelwriter.readthedocs.io/en/latest/setup_windows.html), and
|
|
[macOS](https://novelwriter.readthedocs.io/en/latest/setup_mac.html).
|
|
They are pretty straightforward.
|
|
|
|
## Running from Source
|
|
|
|
If you want to run novelWriter directly from the source code, you must run the `novelWriter.py`
|
|
file from command line.
|
|
|
|
**Note:** You may need to replace `python` with `python3` and `pip` with `pip3` in the instructions
|
|
below on some systems. You may also want to add the `--user` flag for `pip` to install in your user
|
|
space only.
|
|
|
|
### Dependencies
|
|
|
|
Dependencies can generally be installed from PyPi with:
|
|
```bash
|
|
pip install -r requirements.txt
|
|
```
|
|
|
|
### Additional Steps for Linux
|
|
|
|
On Linux, you can most likely find the dependencies in your distribution's repository. On Ubuntu
|
|
and Debian, run:
|
|
```bash
|
|
sudo apt install python3-pyqt5 python3-lxml python3-enchant
|
|
```
|
|
|
|
If you want to set up a launcher and icons on Linux, you can run:
|
|
```bash
|
|
python setup.py xdg-install
|
|
```
|
|
|
|
### Additional Steps for macOS
|
|
|
|
First, make sure you have properly set up Python3 with Homebrew. If not, check their
|
|
[documentation](https://docs.brew.sh/Homebrew-and-Python).
|
|
In addition, the following steps are necessary to install all dependencies:
|
|
```bash
|
|
brew install enchant
|
|
pip3 install --user -r requirements.txt
|
|
pip3 install --user pyobjc
|
|
```
|
|
|
|
### Additional Steps for Windows
|
|
|
|
Windows does not by default come with Python installed. If you haven't installed it already, get it
|
|
from [python.org/downloads](https://www.python.org/downloads/). Remember to select "Add Python to
|
|
PATH" during the installation.
|
|
|
|
The script `windows_install.bat` in the `setup` folder can be used to create desktop and start menu
|
|
icons for novelWriter. The script will also install dependencies for you from PyPi.
|
|
|
|
## Internationalisation
|
|
|
|
If you install from source, you must build the translation files yourself if you want to switch to
|
|
a different GUI language than British English. This requires that you have the Qt translation
|
|
framework installed. Check the specific instruction in the README in the `i18n` source folder for
|
|
how to build the translation files.
|
|
|
|
## Debugging
|
|
|
|
If you need to debug novelWriter, you must run it from the command line. It takes a few parameters,
|
|
which can be listed with the switch `--help`. The `--info`, `--debug` or `--verbose` flags are
|
|
particularly useful for increasing logging output for debugging.
|
|
|
|
## Licenses
|
|
|
|
This is Open Source software, and novelWriter is licensed under GPLv3. See the
|
|
[GNU General Public License website](https://www.gnu.org/licenses/gpl-3.0.en.html) for more
|
|
details, or consult the [LICENSE](https://github.com/vkbo/novelWriter/blob/main/LICENSE.md) file.
|
|
|
|
Bundled assets have the following licenses:
|
|
|
|
* The Typicons-based icon themes by Stephen Hutchings are licensed under
|
|
[CC BY-SA 4.0](http://creativecommons.org/licenses/by-sa/4.0/). The icons have been altered in
|
|
size and colour for use with novelWriter, and some additional icons added. The original icon set
|
|
is available at
|
|
[stephenhutchings/typicons.font](https://github.com/stephenhutchings/typicons.font).
|
|
* The Cantarell font by Dave Crossland is licensed under
|
|
[OPEN FONT LICENSE Version 1.1](http://scripts.sil.org/OFL).
|
|
It is available at [Google Fonts](https://fonts.google.com/specimen/Cantarell).
|
|
* The Tomorrow syntax themes use colour schemes taken from Chris Kempson's collection of code
|
|
editor themes, licensed with the
|
|
[MIT License](https://github.com/chriskempson/tomorrow-theme/blob/master/LICENSE.md),
|
|
and the main repo is available at
|
|
[chriskempson/tomorrow-theme](https://github.com/chriskempson/tomorrow-theme).
|
|
* Likewise, the Owl syntax themes use colours from Sarah Drasner's code editor themes, licensed
|
|
with the [MIT License](https://github.com/sdras/night-owl-vscode-theme/blob/master/LICENSE), and
|
|
the main repo is available at
|
|
[sdras/night-owl-vscode-theme](https://github.com/sdras/night-owl-vscode-theme).
|
|
|
|
## Screenshots
|
|
|
|
**novelWriter with default system theme:**
|
|

|
|
|
|
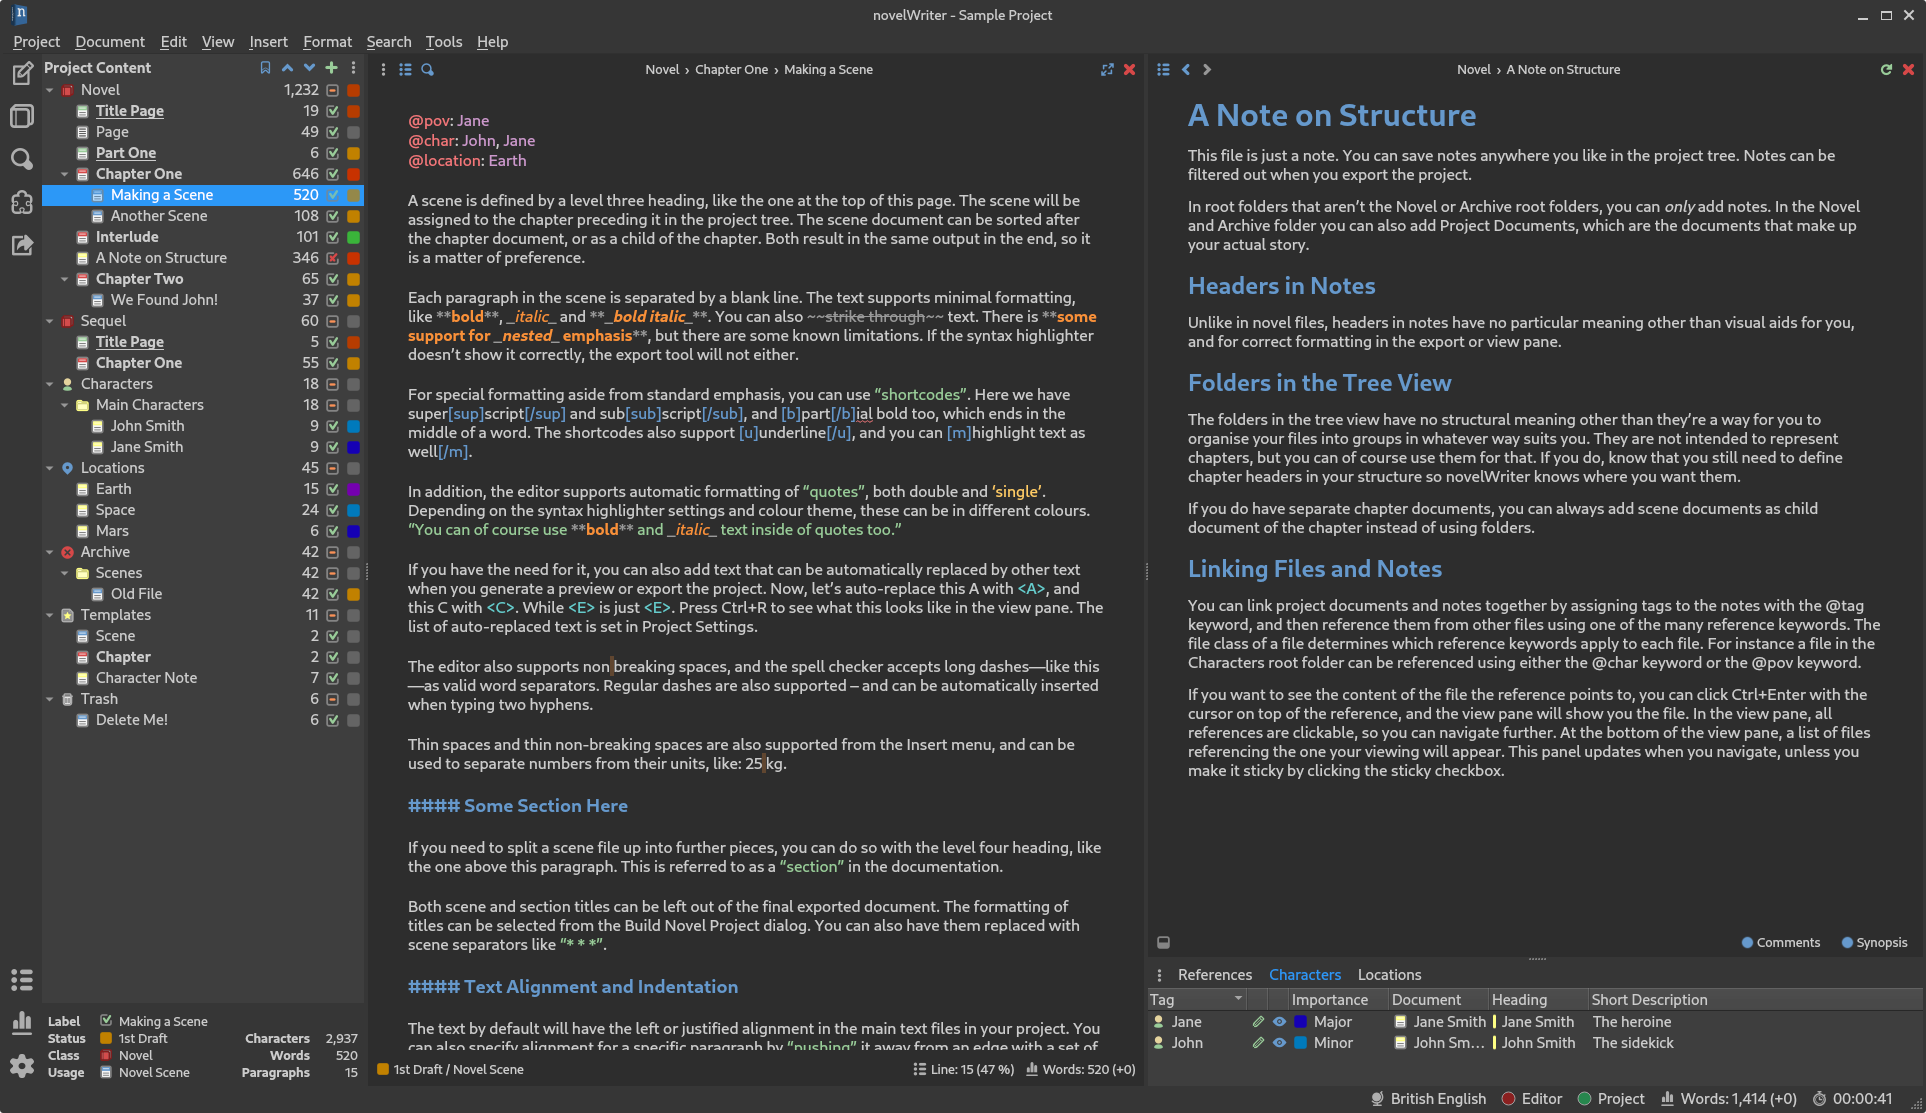
**novelWriter with dark theme:**
|
|
|